Discovery posted an article on trail nutrition. It's worth a read. Personally I find their options to be great alternatives to the expensive and high sodium freeze dried products on shelves. Many home made trail recipes can be found at www.backpacker.com, under the "food & nutrition" tab. You can also refer to some of the recipies that have been posted on this site in the past.
My next in depth posting will probably be on bungees, campers, guy-outs, and other methods of withstanding high wind. And in case anyone is curious, yes it is from recent personal experience. Here's the aftermath. Of course it's all relative and pales in comparison to what Florida gets. Hold on to your britches FL.
Thursday, November 3, 2011
Tuesday, October 25, 2011
Wintering With Fuel Canisters (part 2)
Jetboil was kind enough to reply to my email concerning their Four Season fuel mix. According to their customer service the mix is 80% Isobutane and 20% Propane making it exactly the same as MSR's. Mr. Caffin responded to my email as well (quite quickly too) and stated that most of the companies which sell these outdoor fuels get the combustibles from the same manufacturers, so the quality of the fuel is probably the same. This makes MSR and Jetboil fuel pretty much equal. That is not to say that SnowPeak's fuel is poor quality, but it will perform more consistently and longer in warmer temperatures. Four days have passed since I requested further information on the canisters and still no word from Brunton about the Primus PowerGas composition.
Not everyone is going to use these stoves in -40F so for most users of these products none of this makes a difference. In that case price is probably the most important factor. For the few that will try to use these cans in extreme cold there are ways to continue to get good pressure from them. One way is to use an adapter that will allow the can to stay remote and that will allow one to position it upside down. That will allow access to the propane which is what you want to use in very cold temperatures. Another way is to reflect some of the heat from the stove back to the can to keep it at a temperature in which it operates at a reasonable pressure. This can be very dangerous to do and I don't recommend it. There are many articles online with pointers on how to do it somewhat safely, but I'm not going to get into it at all. This method should be avoided if at all possible. One could also carry two canisters. Keep one can in your jacket while one is in use. When the pressure drops on the can being used switch to the warmer one and continue cooking. Needless to say this is quite inconvenient. In my opinion the best thing to do if below freezing outings are a regular occurance is to invest in a white gas stove. If Brunton ever replies I'll add to this article further, but that's not looking likely at the moment. Until next time!
Not everyone is going to use these stoves in -40F so for most users of these products none of this makes a difference. In that case price is probably the most important factor. For the few that will try to use these cans in extreme cold there are ways to continue to get good pressure from them. One way is to use an adapter that will allow the can to stay remote and that will allow one to position it upside down. That will allow access to the propane which is what you want to use in very cold temperatures. Another way is to reflect some of the heat from the stove back to the can to keep it at a temperature in which it operates at a reasonable pressure. This can be very dangerous to do and I don't recommend it. There are many articles online with pointers on how to do it somewhat safely, but I'm not going to get into it at all. This method should be avoided if at all possible. One could also carry two canisters. Keep one can in your jacket while one is in use. When the pressure drops on the can being used switch to the warmer one and continue cooking. Needless to say this is quite inconvenient. In my opinion the best thing to do if below freezing outings are a regular occurance is to invest in a white gas stove. If Brunton ever replies I'll add to this article further, but that's not looking likely at the moment. Until next time!
Friday, October 21, 2011
Wintering With Batteries and Canister Fuels
First off let me start by apologizing for such a delayed posting. Homeinapack has been neglected as usual by work. I've come to the realization that regardless of how much subsistence living you think one can do, a few bucks will always be needed. Even most of the tribes here in Alaska partake in the cash economy rat race these days.
State of Homeinapack is getting a few changes. First off a "+1" button has been added. Also, the theme will be reworked to something a little more unique and appealing.
I've finished a season working as a tour guide for Exit Glacier down in Seward and decided to winter in Kenai. Nothing spectacular just working a job to keep alive with. As usual I'm outdoors although in a camper now. Still there is no hookup so it's fuel and batteries for everything I do. Here is the start of my next few posts as I'm waiting to conduct some experiments.
First is the issue of fuel canisters. Having spent most of my time in Alaska in Fairbanks, most of my outdoor cooking was done with white fuel. Now that I'm in warmer winter temperatures I've tried canisters again. To my surprise it still seems that performance is not as good as in warm temperatures. Temperatures here have been averaging between 20F-30F. According to Roger Caffin's site, I should be seeing better burns since propane boils at -43.6F. A resort I worked at last winter ran pure propane stoves, heaters, and lights at -41F with no problems. MSR ISO-Pro fuel is 20% propane so better results were definitely expected. That is not to say that it's not working at all, but I can definitely tell it's not up to par.
This can has been sitting around a bit so I'm going to purchase some new fuel from all the manufacturers that cooperate and run a comparison. Currently I'm waiting for replies from Brunton and Jetboil for numbers on what their "four season" mixes contain. Both MSR and Snowpeak post there mixes on their sites. MSR's ISOPRO is a 80/20 Iso-Butane/propane mix and Snowpeak's Gigapower is 85/15 Iso-Butane/Propane.
Next is a matter of batteries. My regular alkaline batteries that were used all last winter have finally died. These were on my Petzl Tikkinna2 headlamp. Since I was passing by REI I decided to buy the new Core battery for it instead of regular batteries. Petzel's Core is made up of a Lithium Ion Polymer which supposedly lasts longer in cold temperatures. Petzel has a pretty good explanation of some battery characteristics here. Again temperatures in my current location are averaging between 20F-30F, but I've already had to recharge twice. Now assuming the Core is able to hold charges longer than the lifespan of my old batteries it would still be worth it with the only inconvenience being to have to recharge. For longer outings it would still be beneficial to use the Core instead of regular batteries since carrying a solar panel or hand crank would be lighter than a few packs of batteries. Some investigation into other lighting sources was done, but that is a post for another time.
Monday, May 24, 2010
Success At Wickersham and Other Updates
Poor Homeinapack has been a little neglected lately due to the amount of outings I've been taking, illness, and some laziness. Hopefully this lengthy update will compensate.
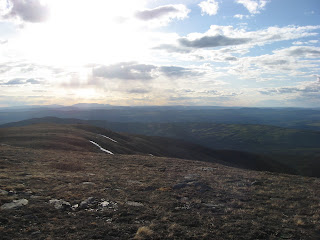
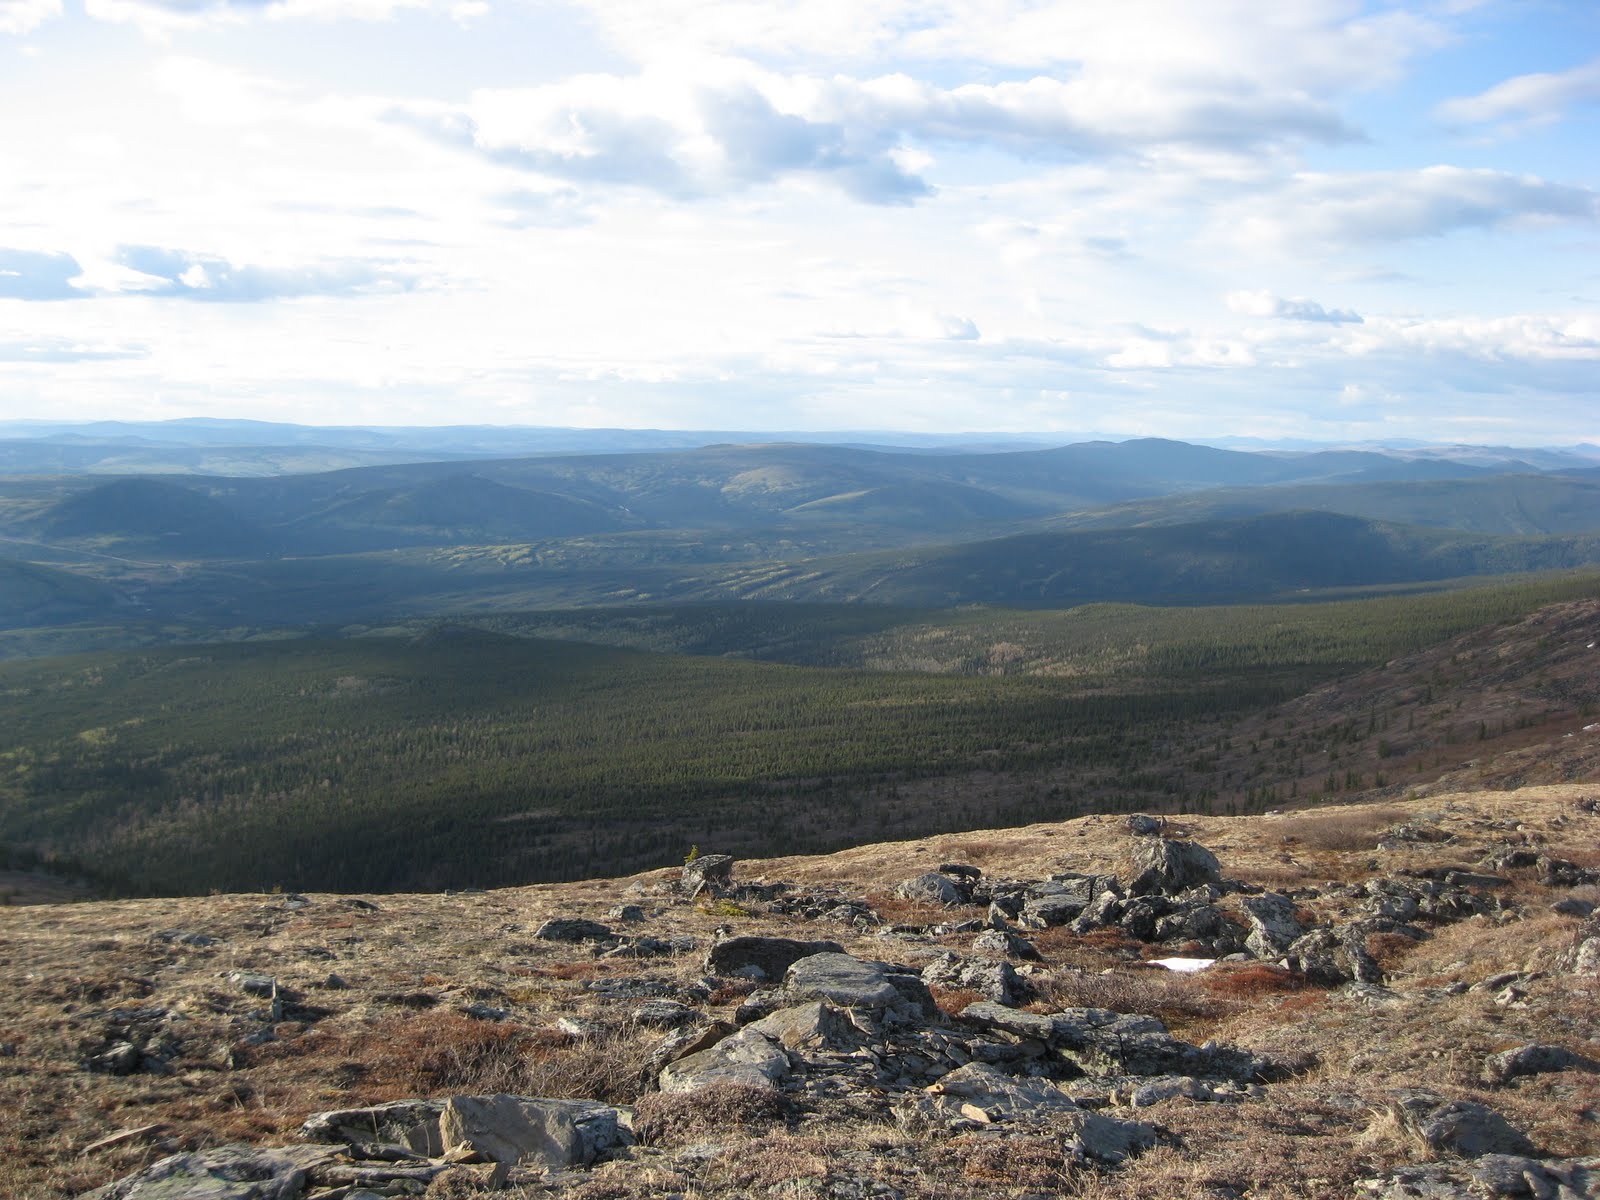
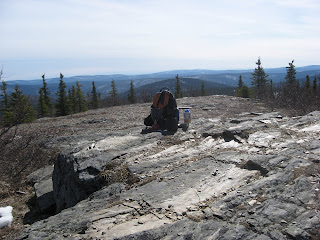
First, I was finally able to hit a summit in Alaska. There were little snow patches visible in the distance on the Wickersham Dome trail but none of it interfered with our travels this time. Two other friends from the hostel I'm staying at joined me on the trip. It doesn't take but half an hour to get a payoff from this hike. In half an hour you get to the lunch spot I posted on my previous attempt at this dome. After some typical hiking through spruce, the trail gets a little unique with a raised muddy portion that goes on for what I estimate is 200 meters. This portion is raised about 3 feet up and is about 1.5 feet wide. There were many wooden planks along the sides of the trail. Most likely they are going to add some boardwalk to this section. Although the hike is for Wickersham Dome it uses Summit Trail as the path in. Summit Trail does not actually reach the dome's summit though so once one gets close it is necessary to go off trail to reach the top. As usual, the high domes are marred with communications equipment. Most of the way up is comprised of muskeg but it was not too soggy. At the top the view was amazing. In the distance the highway and the pipeline are visible. An easy to moderate hike well worth the trip. It is my assumption that the moderate rating is due to the necessity to go off trail in order to reach the summit.


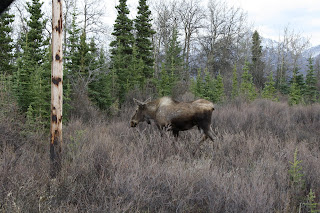
A few days after completing Wickersham we wen to attempt Savage Trail. This is the road that Christopher McCandless, of "Into the Wild" fame, travelled on the way to the abandoned bus. Before leaving we were warned that the river may be impassible at this time of year. We in fact did not reach the bus, but it was definitely a worthwhile trip. Savage Trail doesn't provide too much of a challenge in my opinion. Most inclinations are trivial, the trail is very obvious, there are pre-established camp sites, water is plentiful, and it's not that long. Crossing the river is definitely the challenging part. Do expect to have cold, wet, muddy, feet throughout most of the hike. Rabbits are all over the trail. Since this area is not actually a part of Denali park hunting is allowed. That is evident early on into the hike where a few inconsiderate hunters left their shotgun shells and empty beer cans laying there fulfilling a truthfully stereotype. High, weak, ice prevented us from making it to the bus. We spent a night near Savage River then cam back. On our way out we spotted a cow moose and the remains of another.


Danali park is only about 30 miles from Savage Trail. We decided to go there for the last two days. Even the park is not open all the way across yet. There is still some clearing and repairs being conducted. Our first evening at the park we spotted two porcupines, but my flash is poor so the images did not come out. On the next day I visited the science center, visitor center, restaurant, and bookstore. Afterwards I did a short loop trail of the Savage River. There I snapped a few pictures of a Willow Ptarmigan. Every time I turned the camera away it would try to get my attention. I swear it knew I was taking pictures and was trying to pose.


Gear Review: Ozark Trail Peyton Boots

First let me start by stating the following rant is not negative because it's a Walmart product. I'll be the first to admit I like several Walmart items for hiking. For example they have a fantastic day pack with a hydration pocket for around $30 which I swear by. That is for a different review though. These boots claim to be water proof and they were for a while. About three months to be exact. My shoes go through quite a bit of abuse so I don't expect them to last as long as they do for most people. However, I haven't even had these shoes 6 months yet and I'm about to throw them out. There are rips on the inside liner and insole. In the middle of the boots there is a ridge that looks to be part of the brand stamping on the sole. Both of these cause any socks I wear with these boots to be destroyed by the end of the day. Recently I purchased new insoles to see if they help. Currently my shoes are drying so I'll update later if it helped. I also purchased a pair of $15 Starter sneakers from Walmart that I've been using for river crossings. Even these have outlasted the Ozark Trail shoes. Avoid giving in to the low price tag on these crappy shoes. This is one of the cases where spending a few extra bucks will spare one quite a bit of frustration.
Tips: Ziploc meals
With a little bit of time, it is cheaper and just as convenient to pack your own food instead of purchasing expensive dehydrated foods such as Mountain House. Don't misunderstand, Mountain House meals are actually pretty good, but it's much cheaper to purchase your own. Another thing to consider is sodium intake. Many store bought dehydrated foods are actually two servings and each serving has close to 50% of the daily sodium intake. Some of the food packs are also quite big in my opinion. They're a little clumsy to fit in the pack sometimes let alone reuse. Sealable bags can simply be washed out and re-purposed for waterproofing electronics, gathering water, or packing a meal on the next trip. A Google search will provide many nice recipes that are relatively easy to make in the bush. An entire section on www.backpacker.com is devoted to outdoor cooking recipes. Here are a few of the ones I enjoy taking because of their simplicity.
First lets take care of breakfast. My preference is cereal. Most supermarkets and stores such as Walmart sell powdered milk which is all natural. Kroger has been the brand I've been using and it tastes just fine. Grab a ziploc, fill it with 1/3 of a cup of powdered milk (quantities may vary depending on brand), grab a fistful or two of your favorite cereal and drop it in the bag. That's it. When you're ready to have it simply add a cup of water. Given the amount of exertion that may be done through your travels it's preferable to take a healthy variety of cereal but there is no sugar police in the bush so do what you like.
For lunch or dinner I use a lot of pasta. Just about anything works, spaghetti, rottini, linguine, etc. Most tomato sauce can withstand being unrefrigerated for a few days. Simply pour some into a ziploc and then place that bag within another just to be safe. Wouldn't want any bears coming after you because there is tomato sauce all over your pack and clothes. Another option for sauce is to buy cans of chili or broccoli and cheese soup and use that for sauce. The con to using cans is that they must be carried out. These too can be recycled into stoves, containers, and other useful items though.
Bread is another great candidate for trips. For bread I use 12 grain with honey. Rather than taking a whole loaf and jars I like to pre-make peanut butter and jelly sandwiches and put them into the bags. Tuna can last a couple of days as well, but do not use any mayonnaise on tuna sandwiches. Don't forget that although meat definitely spoils faster outside of a refrigerator, there is no reason why not to take one or two sandwiches with ham, for example, and simply ensure it's eaten at the first meal. There are even butter alternatives that do not need refrigeration. Those are great for toast.
Hopefully this saves someone a little cash and inspires new ideas and recipes. Feel free to post up any of yours.
First, I was finally able to hit a summit in Alaska. There were little snow patches visible in the distance on the Wickersham Dome trail but none of it interfered with our travels this time. Two other friends from the hostel I'm staying at joined me on the trip. It doesn't take but half an hour to get a payoff from this hike. In half an hour you get to the lunch spot I posted on my previous attempt at this dome. After some typical hiking through spruce, the trail gets a little unique with a raised muddy portion that goes on for what I estimate is 200 meters. This portion is raised about 3 feet up and is about 1.5 feet wide. There were many wooden planks along the sides of the trail. Most likely they are going to add some boardwalk to this section. Although the hike is for Wickersham Dome it uses Summit Trail as the path in. Summit Trail does not actually reach the dome's summit though so once one gets close it is necessary to go off trail to reach the top. As usual, the high domes are marred with communications equipment. Most of the way up is comprised of muskeg but it was not too soggy. At the top the view was amazing. In the distance the highway and the pipeline are visible. An easy to moderate hike well worth the trip. It is my assumption that the moderate rating is due to the necessity to go off trail in order to reach the summit.


A few days after completing Wickersham we wen to attempt Savage Trail. This is the road that Christopher McCandless, of "Into the Wild" fame, travelled on the way to the abandoned bus. Before leaving we were warned that the river may be impassible at this time of year. We in fact did not reach the bus, but it was definitely a worthwhile trip. Savage Trail doesn't provide too much of a challenge in my opinion. Most inclinations are trivial, the trail is very obvious, there are pre-established camp sites, water is plentiful, and it's not that long. Crossing the river is definitely the challenging part. Do expect to have cold, wet, muddy, feet throughout most of the hike. Rabbits are all over the trail. Since this area is not actually a part of Denali park hunting is allowed. That is evident early on into the hike where a few inconsiderate hunters left their shotgun shells and empty beer cans laying there fulfilling a truthfully stereotype. High, weak, ice prevented us from making it to the bus. We spent a night near Savage River then cam back. On our way out we spotted a cow moose and the remains of another.


Danali park is only about 30 miles from Savage Trail. We decided to go there for the last two days. Even the park is not open all the way across yet. There is still some clearing and repairs being conducted. Our first evening at the park we spotted two porcupines, but my flash is poor so the images did not come out. On the next day I visited the science center, visitor center, restaurant, and bookstore. Afterwards I did a short loop trail of the Savage River. There I snapped a few pictures of a Willow Ptarmigan. Every time I turned the camera away it would try to get my attention. I swear it knew I was taking pictures and was trying to pose.


Gear Review: Ozark Trail Peyton Boots

First let me start by stating the following rant is not negative because it's a Walmart product. I'll be the first to admit I like several Walmart items for hiking. For example they have a fantastic day pack with a hydration pocket for around $30 which I swear by. That is for a different review though. These boots claim to be water proof and they were for a while. About three months to be exact. My shoes go through quite a bit of abuse so I don't expect them to last as long as they do for most people. However, I haven't even had these shoes 6 months yet and I'm about to throw them out. There are rips on the inside liner and insole. In the middle of the boots there is a ridge that looks to be part of the brand stamping on the sole. Both of these cause any socks I wear with these boots to be destroyed by the end of the day. Recently I purchased new insoles to see if they help. Currently my shoes are drying so I'll update later if it helped. I also purchased a pair of $15 Starter sneakers from Walmart that I've been using for river crossings. Even these have outlasted the Ozark Trail shoes. Avoid giving in to the low price tag on these crappy shoes. This is one of the cases where spending a few extra bucks will spare one quite a bit of frustration.
Tips: Ziploc meals
With a little bit of time, it is cheaper and just as convenient to pack your own food instead of purchasing expensive dehydrated foods such as Mountain House. Don't misunderstand, Mountain House meals are actually pretty good, but it's much cheaper to purchase your own. Another thing to consider is sodium intake. Many store bought dehydrated foods are actually two servings and each serving has close to 50% of the daily sodium intake. Some of the food packs are also quite big in my opinion. They're a little clumsy to fit in the pack sometimes let alone reuse. Sealable bags can simply be washed out and re-purposed for waterproofing electronics, gathering water, or packing a meal on the next trip. A Google search will provide many nice recipes that are relatively easy to make in the bush. An entire section on www.backpacker.com is devoted to outdoor cooking recipes. Here are a few of the ones I enjoy taking because of their simplicity.
First lets take care of breakfast. My preference is cereal. Most supermarkets and stores such as Walmart sell powdered milk which is all natural. Kroger has been the brand I've been using and it tastes just fine. Grab a ziploc, fill it with 1/3 of a cup of powdered milk (quantities may vary depending on brand), grab a fistful or two of your favorite cereal and drop it in the bag. That's it. When you're ready to have it simply add a cup of water. Given the amount of exertion that may be done through your travels it's preferable to take a healthy variety of cereal but there is no sugar police in the bush so do what you like.
For lunch or dinner I use a lot of pasta. Just about anything works, spaghetti, rottini, linguine, etc. Most tomato sauce can withstand being unrefrigerated for a few days. Simply pour some into a ziploc and then place that bag within another just to be safe. Wouldn't want any bears coming after you because there is tomato sauce all over your pack and clothes. Another option for sauce is to buy cans of chili or broccoli and cheese soup and use that for sauce. The con to using cans is that they must be carried out. These too can be recycled into stoves, containers, and other useful items though.
Bread is another great candidate for trips. For bread I use 12 grain with honey. Rather than taking a whole loaf and jars I like to pre-make peanut butter and jelly sandwiches and put them into the bags. Tuna can last a couple of days as well, but do not use any mayonnaise on tuna sandwiches. Don't forget that although meat definitely spoils faster outside of a refrigerator, there is no reason why not to take one or two sandwiches with ham, for example, and simply ensure it's eaten at the first meal. There are even butter alternatives that do not need refrigeration. Those are great for toast.
Hopefully this saves someone a little cash and inspires new ideas and recipes. Feel free to post up any of yours.
Tuesday, April 27, 2010
Esbit stove update
Since the last post, I've had a chance to test this stove once more. It did indeed take quite a few seconds of exposure to my lighter for the fuel to catch. Once it did, it worked as advertised. There was no smoke and it was odor-less. For about 13 minutes the fuel continued to produce a flame and brought 2 cups of water to a boil. It takes Ramen Noodles three minutes to fully cook and that is exactly what the fuel tablet lasted for. If all you need is to boil water these little stoves are cheap, light, and functional. Forget about any lengthy cooking.
Monday, April 26, 2010
Wickersham Dome Attempt One and Stove Review
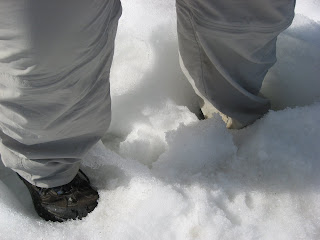
Today was my first walk on Summit Trail which leads to Wickersham Dome. There isn't much that can be said. I've tried to do the scenery justice with pictures, but I don't think I've come close. For the most part the trail is very easy to follow. Where it blends some there are rock piles or tri-pods marking the correct direction. Pretty much the entire trail consists of mud up to the first hilltop. There was a bone on one of the drier sections. After that snow started to gradually appear in greater quantities. Once it got knee high I fought with it a bit, but I was wearing thin pants and my legs and feet were freezing. Unfortunately my ski pants were not with me or I may have continued. In about a month I'll make another attempt. By then the mud should be dry and the snow should be gone.


When I reached the first hilltop I decided to have lunch. It was a comfortable spot with rocks that sort of made a seat facing the hills and mountains in the distance.
Recently I decided to try out an Esbit stove. It was quite windy and neither my lighter nor my fire starter were able to light the fuel tablet. After about five minutes I decided to go to my trust worthy MSR PocketRocket. One strike of the fire starter and I was in business. In short I think the Esbit fuel may take a little to get started. Granted with a little more patience and better wind protection the fuel tablet may have started, but that is already a huge point against it compared to the MSR stove. Where Esbit stoves win are in weight, price, and waste. MSR's PocketRocket costs about $40 compared to about $10 for an Esbit stove with 6 fuel tablets. For extended outdoor stays it may not be as bad to have the MSR stove but for an overnighter a can of isopro is overkill. They appear massive compared to the tiny Esbit tabs. Then there is waste. The only waste from the Esbit fuel is the blister packing. With MSR you have that pesky can. I'll give it another try in the future to be fair but for now my MSR stove continues to come with me because despite Esbit being better for ultralight packing, at least my MSR stove turns on.


When I reached the first hilltop I decided to have lunch. It was a comfortable spot with rocks that sort of made a seat facing the hills and mountains in the distance.

Recently I decided to try out an Esbit stove. It was quite windy and neither my lighter nor my fire starter were able to light the fuel tablet. After about five minutes I decided to go to my trust worthy MSR PocketRocket. One strike of the fire starter and I was in business. In short I think the Esbit fuel may take a little to get started. Granted with a little more patience and better wind protection the fuel tablet may have started, but that is already a huge point against it compared to the MSR stove. Where Esbit stoves win are in weight, price, and waste. MSR's PocketRocket costs about $40 compared to about $10 for an Esbit stove with 6 fuel tablets. For extended outdoor stays it may not be as bad to have the MSR stove but for an overnighter a can of isopro is overkill. They appear massive compared to the tiny Esbit tabs. Then there is waste. The only waste from the Esbit fuel is the blister packing. With MSR you have that pesky can. I'll give it another try in the future to be fair but for now my MSR stove continues to come with me because despite Esbit being better for ultralight packing, at least my MSR stove turns on.
Creamer's field and Beaver Sports
It's been a while since the last update. Believe me it's not from lack of material. If you like the outdoors Alaska is pretty much non-stop. Especially, it seems, if you don't let winter coop you up.
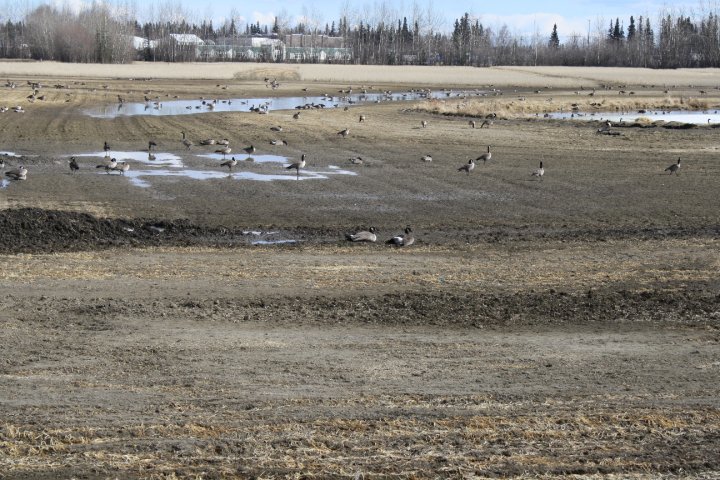
Recently I had the opportunity to spend a day at Creamer's Field, which is about two miles from where I'm staying in Fairbanks. Many of the migratory birds which stop there, including geese and swans, have arrived. Their website, linked above, keeps a count of the birds currently residing there. There is already plenty of documentation explaining the story of the viewing grounds so I will not get into that here. If you'd like to read more about it's history you can check this wiki page.
Most of the trails here range from less than a mile to close to two miles. It takes less than a day to walk them all should you choose to do so. Things are still in that transitional period between winter and spring where the colors aren't there yet and everything is muddy from the melting snow. According to the brochure this is when the wetlands and lakes there are created. Permafrost prevents the earth from absorbing all of the water creating these bodies of water. As the rains roll in the lake will fill up and life will boom. Besides birds, some of the wildlife that can be found at Creamer's Field include predaceous diving beetles, wood frogs, and an occasional moose.
Once one has traversed what is available at Creamer's Field, there is a connecting trail to the bird observatory on the other side of the field. Once there two more trails, chickadee loop and wanderers trail, are available. While walking the connecting trail to the bird observatory I noticed some pretty bright berries hanging. Since I'm unfamiliar with what they were, they remained there. Later I was informed that they were cranberries. Apparently it is not uncommon for some of them to survive the winter.


Given the vast amount of outdoor activities there are here in Alaska, in place of Starbucks, there is an outdoor store on every corner. That is a small exaggeration, but there are a lot. Closest to my current residence is Beaver Sports. So far every time I've been there has turned into at least a one hour event. This is because the staff there is so helpful. My first trip there at least half an hour was spent talking about sleeping bags adequate for my outings and the best viewing places and times to see the northern lights. After that at least another hour in the canoe building discussing rafting practices and the varying vessels.
My pack is a few straps short to carry my gear so I decided to go over and buy some webbing straps with buckles. Although they carry these they were not long enough for my needs. When I inquired if there was any by the foot at the climbing department he said no but provided me another solution. There is a high tensile strength tubular webbing which the employee said would work. It is cut with heat so the ends are melded together which prevents fraying later. Apparently one of their staff members came up with the idea to use the edge of the heated cutter to meld an end without cutting. This allows them to fold the webbing through a buckle and meld it into a loop. They tested the meld in-house with a 200lb employee they strapped to a climbing harness that is hung from the roof of the store. Considering I only need it to keep a mat and tent in place that was good enough for me.


It also turned out the employee was a photographer. I asked what he used to carry an SLR with lenses on an extended hike and that was the begining of another one hour conversation. Then gentleman checked that all of the customers were attended to then went out to his car and returned with a Tamrac Velocity series bag. He proceeded to show me how he straps it to his chest so he can carry a pack and then secures it to the pack with carabiners and webbing. This distributes the weight and allows him to take off one pack without having to remove the other as he would need to if he were using the included strap. After that he showed me how he waterproofs the interior by lining the pack with a Sea Line Storm Sack. To top it off he carries a second lens and protects it by putting it into an insulated neoprene water bottle carrier. GENIUS!! These were all great ideas and the time and depth he put into it all was above and beyond his job description I'm sure. He even gave me his personal business card in case I had any more questions related to photography or hiking with the camera equipment. It's been my experience that most people here are willing to pass on what they know be it about cameras, hiking, hunting, or just general living in the state.
Subscribe to:
Posts (Atom)

